What you will need
So, you want to make that childhood dream come true and you want to know what you need in order to do that. You will need to be PC literate, used to messing around inside of PCs and also used to working "behind-the-scenes" with command prompts and the like. In addition, you will need to know how to install an operating system such as Windows 98 from scratch. If all goes well, you will only need a day of your time.
The hardware that you need is as follows:
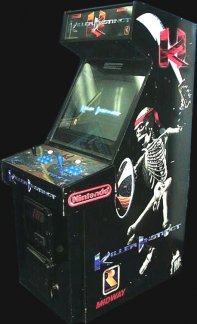
JAMMA compatible arcade cabinet
PC, 512MB+ RAM, 1GHz+ processor, 40GB+ hard disk, 120MB+ floppy drive, DVD ROM drive
15KHz compatible video card
Old-school sound card
JPAC interface
PC speaker system
The software that you need is as follows:
Windows 98 or MSDOS 7
Memory manager
AdvanceMAME
AdvanceMENU
MAME roms
The hardware
Setting up the hardware is relatively easy, once you've got the right equipment. Obtaining a second-hand JAMMA arcade cabinet is simple enough - just hop onto eBay and hunt one down. You can normally pick these up for less than £100, but don't forget that you'll need a large estate car or a van in order to collect it and take it home. If you haven't either of these then you'll need to factor in the cost of hiring a van which can be significant. Make sure you get a cabinet that has enough room to take a PC motherboard with a couple of PCI cards in it, a PC power supply, a hard disk and your PC speaker system. Some cabinets can be quite cramped, but others have more than enough room. Something like a "Goliath" cabinet has plenty of room and you should be aiming for something of that size.
|
|
|
Inside an arcade cabinet |
|
Danger Will Robinson! Danger! |
Now comes the part where you mess around inside the arcade cabinet and fit your PC components. Messing around inside arcade cabinets is dangerous. Your arcade monitor can hold 25,000 volts of electricity and this can take as much as a week to discharge after you have switched it off! This kind of voltage can easily kill you! There are also dangerous voltages emanating from the voltage regulator inside the arcade cabinet that powers all of its components. Do not mess around inside arcade cabinets unless you know what you are doing - I take absolutely no responsibility for any injuries you may incur, or damage that you may cause to your equipment, from you reading the information on this page. This page is just a guide - you need to take responsibility for your own actions upon reading it.
You will need to run a 4-plug electrical socket into the cabinet somehow, as this will be required to power the PC, the PC speakers and even the cabinet too if you can get the cabinet's electrical plug socket back inside of the cabinet. That way, you'll only have one cable running out of the back instead of two, which you then just plug into the wall (but not yet!)
Your PC motherboard will go where the game board would normally sit in the cabinet (which of course we no longer need), and this is often kept in place by a board holder which you just need to slot your motherboard into. The sound and video cards will just sit on top of the motherboard, but they won't have any bracket to keep them in place like they would have in a PC case so you'll need to ensure that either the motherboard lies flat or that you have an alternative method of keeping them secure.
The PC power supply can go anywhere inside the cabinet, so long as the cables from it reach the required points on your motherboard and associated devices. Try to keep the power supply away from the monitor though as that might cause visual interference. Your hard disk too can also be placed anywhere but it normally needs to be close to the motherboard because of the length of the cables. Plug the PC power supply into the 4-gang electrical socket to enable it to be powered later.
The PC speakers may cause you the most trouble, as they will need to be put where the original speaker in the cabinet is located along with it's grill to allow the sound to get out of the cabinet unimpeded. The original speaker needs to be removed as you have no way of connecting it to your PC, unless you really know what you're doing with regards to making your own connection. Often too, arcade cabinets only come with a single speaker, and we really want some stereo action to make the most of the gaming experience. Personally, I have a couple of small Cambridge speakers in the top of my cabinet for stereo effect and a sub-woofer in the bottom to give it all some punch. This setup works very well and didn't cost very much at all. Once you've put your speakers in properly, plug their power supply (if they have one) into the 4-gang electrical socket to enable them to be powered at a later time.
So, your PC bits and pieces are spread around your arcade cabinet. You have some speakers connected to the sound card which sits on your motherboard along with your video card. You have a hard disk also connected to the motherboard. The whole lot is powered by your PC power supply and you're almost there.
At the moment though, all you have is a PC in an arcade cabinet - it has no way of displaying output and no way of receiving inputs from the arcade controls. You can make your own interface for this kind of thing, but trust me, it's much simpler to just head on over to www.ultimarc.com and buy a J-PAC controller. This little device plugs into the JAMMA interface inside the arcade cabinet - the interface that you would normally connect a real arcade game board into. Then, you run a cable from the J-PAC interface to your video card and you have video output, instantly! You also run a cable from the J-PAC interface to your keyboard input on the back of your motherboard and you have controller input, instantly! No messing around, just plug-and-play. You can also connect a real keyboard to the J-PAC interface and it then passes keystrokes through just like the keyboard was plugged directly into the back of the motherboard.
Accept no substitutes - get a J-PAC - it will save you no end of hassle.
Now, the video card is a tricky area. You need a video card that can output "15KHz frequencies" - which means the horizontal refresh rate on the monitor is 15KHz (well 15.75 actually). A lot of PC video cards cannot do this, but some video cards that I know can are:
ATI Rage 128
ATI Radeon 7xxx series
Matrox G400
Other video cards may well work, so try them and see - but don't go paying out money for one "just in-case" it might work, as the chances are good that it won't. Again, help is at hand if you're not sure - go over to www.ultimarc.com and get hold of an ArcadeVGA card. These cards output the right frequencies - all of the time. This is something that regular PC video cards won't do. When you switch on a PC video card it starts up in a high-frequency mode and the output sent to the arcade monitor is unreadable. The ArcadeVGA card always sends readable output, right from the moment it starts up. So, unless you don't want to spend the money, I would highly recommend the ArcadeVGA card.
If you do have a regular PC video card though, there is a DOS program that you can use that switches the frequency of the output to something you can read quite easily.
The sound hardware too can be tricky. You need something relatively old as you will need DOS drivers for it and it needs to be something relatively popular or generic in order for the software that we'll be using to pick it up. What I've done is to use a SoundBlaster Live as they're still relatively easy to pick up, especially in second-hand places like eBay. Then I got hold of some DOS drivers that make the SoundBlaster Live seem like a SoundBlaster 16 to rest of the system.
The last thing that you need to do is connect the floppy drive and the DVD ROM drive. Both of these devices are relatively temporary, in that they won't be needed during the normal running of your system. To set the system up however, you will need either one of these devices in order to get new software installed onto the hard disk. I tend to use the DVD ROM drive for doing the installation and for installing large updates to the system, so I only connect that up when it's needed and I don't normally have it installed in the cabinet. The floppy drive though I use fairly regularly for minor updates - copying new ROM files across, that sort of thing. I normally disconnect its power when it's not in use, just so that I don't hear it grinding when the system boots up. If you're going to use a floppy drive like this, then make sure it's a high density variety like 120MB+, otherwise it'll be next to useless.
Once you've hooked up these temporary drives, that's it - job done. All your hardware is now completely setup and you can concentrate on sorting out the software side of it all. At this point, you can plug that 4-plug electrical socket that we talked about earlier into the wall socket to get the whole thing powered up. Stand clear of the back of the monitor!
The software
The software setup can be very tricky, you will need to do this carefully as each system is different, depending on the software versions you have and the sound hardware that you have installed.
The first thing you will need to do though is connect your PC video output to a real PC monitor - this will make things easier during the initial stages of installation. If you have an ArcadeVGA card installed then leave your PC connected to the arcade monitor - you only need a PC monitor if you're using a regular PC video card. You will want to install Windows 98 onto a freshly formatted hard disk. Only install the minimum of files for Windows 98 as we won't actually be using Windows itself once the cabinet is in use. What we really want is MSDOS 7 that comes with Windows 98 as that has all the DOS goodies that we need - including support for relatively large hard disks. So, don't bother installing networking, the Internet or pucker Windows drivers for your hardware - just do the minimum that you can to get Windows installed.
Once Windows has been installed, edit the AUTOEXEC.BAT file and remove the last line called 'WIN' that starts up Windows itself. Then, next time you reboot, the system will boot straight to DOS instead of Windows, which is exactly what we want.
Next copy the following files to the root of your C: drive:
SMARTDRV.EXE
and
UNZIP.EXE
You then need to edit your CONFIG.SYS file so that it looks like this:
NUMLOCK=ON

BREAK=ON

DOS=HIGH,UMB,NOAUTO

FILESHIGH=40

FCBSHIGH=1,0

BUFFERSHIGH=30,0

LASTDRIVEHIGH=J

STACKSHIGH=9,256

DEVICE=C:\WINDOWS\HIMEM.SYS

DEVICE=C:\WINDOWS\EMM386.EXE NOEMS NOVCPI RAM /MIN=0 I=B000-B7FF

SHELL=C:\COMMAND.COM C: /E:1024 /P
This of course assumes that you have Windows installed in the WINDOWS directory - if not then modify the commands accordingly. You will now need to edit your AUTOEXEC.BAT file so that it looks like this:
@ECHO OFF

CLS

LH C:\SMARTDRV.EXE 4096

LH C:\CWSDPMI\BIN\CWSDPMI.EXE -p

PROMPT $P$G
This will make sure that we have some disk caching on and that we've also got a DOS virtual memory manager loaded that most of the software that we will be using requires. You haven't installed the memory manager yet though, you can download that here and unzip it from the root of your C: drive. As with all of the zip files I've provided, you will need to unzip it using the UNZIP program. For the memory manager for instance; copy the CWSDPMI.ZIP file to the root of your C: drive and then type:
UNZIP CWSDPMI

DEL CWSDPMI.ZIP
You now need some arcade monitor support if you have a regular PC video card. This support can be found in AdvanceCab which you should install to its own directory on your disk somewhere. Install this software even if you're using an ArcadeVGA card as it contains other useful utilities that you will need. Copy the ADVCAB.ZIP file to the root of your C: drive and then type:
UNZIP ADVCAB

DEL ADVCAB.ZIP
The AdvanceCab utility software is now installed on your disk and you can add the following line to the beginning of your AUTOEXEC.BAT file:
ADVCAB\VGA /L /C ADVCAB\STANDARD.RC
You should skip this step if you have an ArcadeVGA card as you can already see video output on your arcade monitor.
Now you need to install the main pieces of software that you will be using; AdvanceMenu and AdvanceMAME. Download these files, copy them to the root of your C: drive and then type:
UNZIP ADVMENU

DEL ADVMENU.ZIP

UNZIP ADVMAME

DEL ADVMAME.ZIP
We use AdvanceMenu and AdvanceMAME specifically because they support arcade monitors much better than any other version of MAME out there. We could use the regular DOS version of MAME (if it were available), but this only puts a small image in the centre of the screen which is practically unusable. Trust me, if you're using an arcade monitor, then AdvanceMenu and AdvanceMAME are by far the best pieces of software available to you.
The versions of this software are contemporary to MAME version 0.95 (May 2005). Software versions are important and I have provided these download links so that you can get the software that I currently have - that this document was written around. More up-to-date software can be downloaded directly from advancemame.sourceforge.net but you might find that you have installation problems due to the information on this site being out-of-date with the newer software versions. If I were you, I'd use the software links above to get yourself up and running and then consider upgrading later when you know that you've got a good foundation to work from.
We have all the software that we need now to create a version of MAME that works with an arcade cabinet, complete with a menu system for you to choose which games that you want to play. None of this software is in the right place or integrated together to form a working system though - that's rather more complicated and we'll start looking at that now.
The next thing that you need is a bare DOS MAME installation into which you can copy the appropriate AdvanceMenu and AdvanceMAME files. You can download a bare installation here as DOS MAME is apparently no longer supported in terms of binary distributions from the main MAME Internet site. Copy the MAME.ZIP file to the root of your C: drive and then type:
UNZIP MAME

DEL MAME.ZIP
You should now have a new MAME directory on the root of your C: drive that will contain the installation of MAME that you will be running. Now we'll add some new data files - these files are updated whenever MAME is updated. The files that you need are for version 0.95 of MAME, and you can download those here. Copy the MAMEDATA.ZIP file to the root of your C: drive and then type:
UNZIP MAMEDATA

DEL MAMEDATA.ZIP
This will create some new data files in your MAME directory, these files are called CATVER.INI, HISCORE.DAT and HISTORY.DAT. Although not necessary files, they do provide some very interesting information about categories of games, global hi-scores for individual games and also the complete history of individual games as well.
Game artwork is something that you can use to make the AdvanceMenu menu system look a lot nicer. AdvanceMenu will use game artwork when it is present to give you an idea of what each game looks like before you even play it. You will need to download this artwork first however and install it into the correct place in the MAME installation. You get can game screen shots from www.classicgaming.com - you just unzip the "screen shot packs" into your MAME\SNAP directory. Similarly, you get can title screen shots from www.mametitles.com - you just unzip the "title packs" into your MAME\TITLES directory. You should expect to find a load of PNG files in each of these directories when you're done. If you've got ZIP files, then you've forgotten to unzip them.
Onto the data files that you need in order to play the games. You basically need two types of files; roms and samples. I'm not going to allow you to download these files from this site as that would be illegal.
To obtain this data, type 'MAME ROM DVD' into Google and see where you can obtain the files from. There are plenty of sites available that do this kind of thing and they normally cost between £10 and £30. Most suppliers will give you all the MAME files that you need, including; roms, samples, game screen shots, title screen shots etc. There are two types of rom files; described as roms and chds. Roms are what you really need, chds are for relatively recent games that play very slowly on contemporary hardware. So in reality, you don't really need the chd files as you'll only miss out on less than a hundred games that are practically unplayable anyway due to their slow speed. Most suppliers will offer you the choice of the complete MAME rom sets on around 4 DVDs and an additional 6 DVDs containing the extra chd files.
When you've gotten hold of the rom and sample files, put the rom files into the MAME\ROMS directory - you don't unzip them, you just copy the zip files into the directory. MAME uses ZIPped roms to try and conserve space, and because there's enough files as it is without unzipping the contents! Similarly, put the samples in the MAME\SAMPLES directory - again, just copy the ZIP files there and don't unzip them.
You do have a version numbering issue here. If you install AdvanceMAME 0.95 (as supplied on this site), and then install roms for version 0.98 (for instance), there is a good chance that some of the rom files will not match those which AdvanceMAME was compiled against. Therefore, at least some of your rom files will be inappropriate for this version of AdvanceMAME and subsequently the games to which those roms belong will not be playable. Typically, the error is somewhere around 50 roms for each version of AdvanceMAME that you're out by. For instance; if you installed roms for version 0.98 but were running AdvanceMAME 0.95, around 150 rom files would be unusable. Don't worry too much about any of this for now though. Get your rom files and install them so that you'll be able to play at least some of the games - then we'll talk about upgrading AdvanceMAME later to match the rom versions that you have and get all of them working. If you can find a web site that supplies roms specifically for version 0.95 of AdvanceMAME though, everything will work straight off the bat and Robert's your Mother's Brother.
That's practically all of the data sorted out now and it's time to copy over some files from your AdvanceMAME and AdvanceMenu installations into your new MAME installation. Essentially, you need to copy all of the EXE files from the ADVMAME directory to the MAME directory, along with EVENT.DAT as well. You then need to copy all of the EXE files from the ADVMENU directory to the MAME directory. Once that's been done, you need to copy the entire CONTRIB directory from the ADVMENU directory to the MAME directory and you're finished. That's all the file copying complete.
AdvanceMAME and AdvanceMENU both use configuration files called ADVMAME.RC and ADVMENU.RC. These won't be present on your hard disk just at the moment, but they can be created easily by typing:
ADVMAME -default

ADVMENU -default
This will have created new ADVMAME.RC and ADVMENU.RC files your hard disk with default settings ready for you to edit with a text editor to configure each of the programs to suit your needs. You can use the EDIT command that comes with MSDOS 7 to edit these files for the moment. Information about the settings contained within these files is contained within the text documents ADVMAME\DOC\ADVMAME.TXT and ADVMENU\DOC\ADVMENU.TXT. These documents will give you an explanation of each of the configuration settings you can use for each of these programs - something you will need to become very familiar with.
Firstly though, we need to get a basic working setup to start you off with. For this, we need to adjust a couple of settings and let the programs know what type of monitor you have within your cabinet. To do this, you need to edit each of these RC files to describe the monitor.
For a standard VGA monitor, add the following line to the top of each of the RC files:
display_video_pclock 10 - 50

display_video_hclock 31.5

display_video_vclock 55 - 110
For a multisync SVGA monitor, add the following line to the top of each of the RC files:
display_video_pclock 10 - 70

display_video_hclock 31 - 60

display_video_vclock 55 - 90
For an arcade monitor, add the following line to the top of each of the RC files:
display_video_pclock 5 - 50

display_video_hclock 15.75

display_video_vclock 50 - 60
For a PAL monitor, add the following line to the top of each of the RC files:
display_video_pclock 5 - 50

display_video_hclock 15.62, 15.73

display_video_vclock 50, 60
For a NTSC monitor, add the following lines to the top of each of the RC files:
display_video_pclock 5 - 50

display_video_hclock 15.73

display_video_vclock 59.94
Also add the following line to the top of the ADVMAME.RC file:
display_adjust generate_yclock
Lastly, add the following lines to the top of the ADVMENU.RC file:
emulator "advmame" advmame "advmame.exe" ""

emulator_titles "advmame" "titles"
That's all of the "must have" settings completed and you should be able to load the software and see something running. Just type ADVMENU to load the menu system and you should see a list of available games to play, based on the ROMs that you have installed in the ROMS folder. It should also be linked the ADVMAME so that any game you choose to play will automatically be loaded into ADVMAME in order for that to happen (ADVMENU can operate with many different emulators if need be).
|
|
|
ADVMENU interface |
|
An example of ADVMENU in action. |
So here you are, finally, the software is setup and the cabinet is ready to roll. You just need to amend your AUTOEXEC.BAT file now to automatically go into the MAME directory and load up ADVMENU for you when you switch the machine on.
Now, go back to the documentation for ADVMAME and ADVMENU to see how you can configure the software to your particular requirements - there's a lot you can do and much tinkering to be had here.
If you're unhappy with the video modes that the software uses (not centred, too big, too small etc), then lookup the documentation for ADVV (part of the AdvanceCAB ZIP file). You can use this program to make adjustments to either the ADVMAME.RC or ADVMENU.RC files to more tightly control the video configuration. This can be quite complex though, and I wouldn't do this until you are very familiar with the software and you have read the ADVV documentation thoroughly.
Other than that, if you run into trouble, just go to the contact page and fire me an email.
[Posted 08/01/2005] |